How to add a user

Credit insurance help & support


The Portfolio Credit Insurance portal enables EDC policyholders to grant and manage user access 24/7. When granting access to a user outside of your organization, EDC recommends that you assign the user a profile that limits what functions they can do on the site.

By default, only your policy administrator is provided access to the Invoices and Statements portal and sent all billing notifications. To manage access to the billing system or to change the recipient of billing notifications, please contact us.

Important information:

Prior to granting access, you must ensure the user is located in Canada. If not, please contact EDC customer care for assistance.

As per the terms of use you have accepted we would like to remind you that:

  • You are responsible to ensure that User IDs and passwords are kept confidential and are not disclosed to anyone.
  • You will be responsible for any:
  1. transaction that is entered into, and
  2. use or disclosure of information in the account, as a result of the use of a user ID and password connected to your account whether authorized or unauthorized.

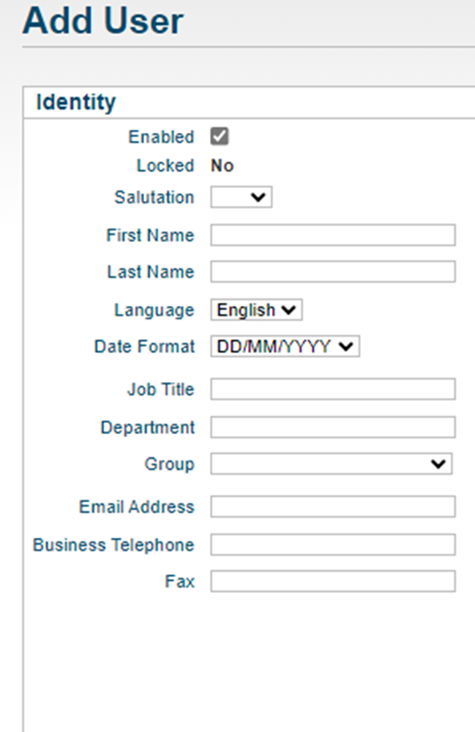
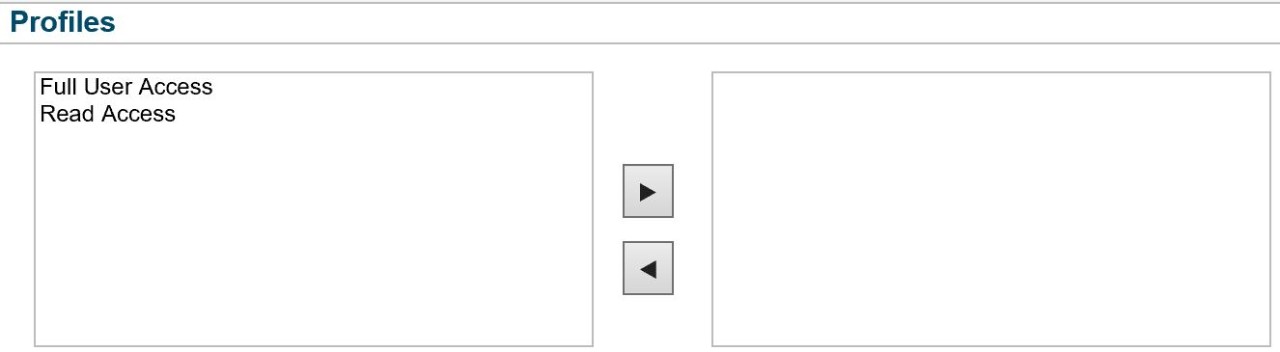
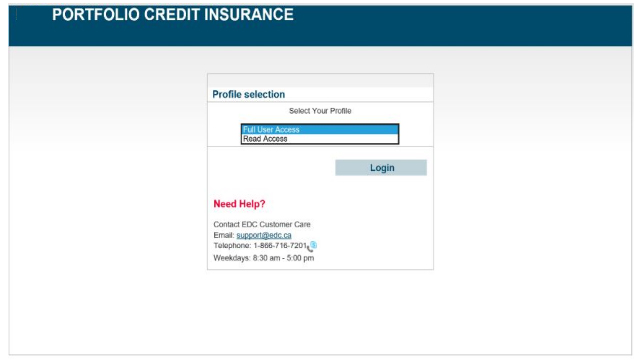
Please be aware, when granting a user Full User Access, they will have full policy administration capabilities. To limit the access, you will need to contact the EDC customer care team to discuss the different options that are available to you.

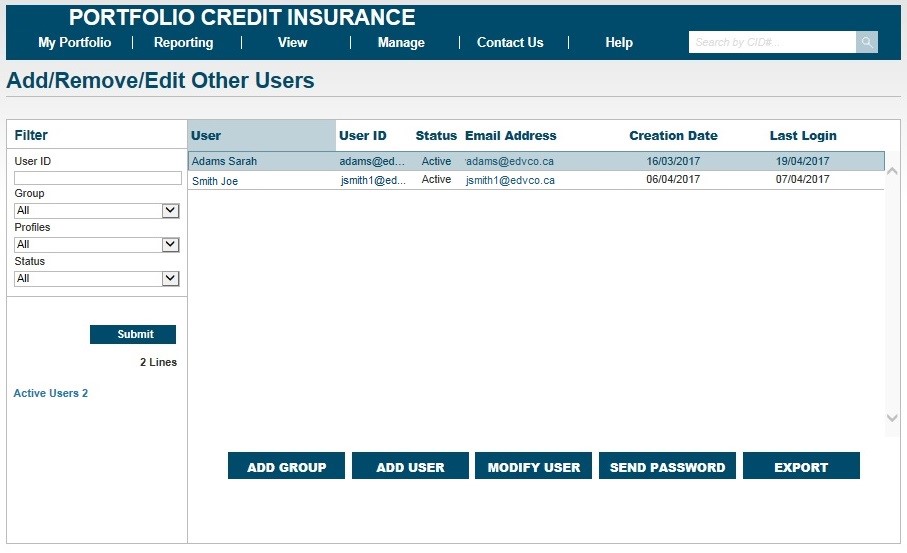
To add a user to your company account on the credit insurance system and grant them access to policy information, follow these steps:

1. Click on the Manage menu and select Add/Remove Other Users

2. A list of current users will appear. Click on the Add User button. 


3. On the Add User form, fill out the salutation, first name, last name, language, date format and email fields for the new user.


4. To grant this new user access to the system, click the Enabled checkbox.

5. Under Profiles, assign the new user a profile by selecting the desired profile from the left column and moving it to the right column by clicking on the appropriate arrow button.

If you do not select a profile, the contact will be unable to log in. 

Please note: When granting access to a user outside of your organization, EDC recommends that you assign the user a profile that limits what functions they can do on the site. If you only have “Full User Access” on your profile and want to limit your new user’s access, you will need to contact the EDC customer care team to discuss the different options that are available to you.

6. Under Contact Policies, specify which policies the new user can access by selecting the desired policy or policies from the left column and moving it/them to the right column by clicking on the appropriate arrow button. 

If you do not specify any policies, the user will have access to all policies.

7. Click on the Submit button to activate the new user’s account. The user will receive an auto-generated email confirmation from the system.

8. To allow the new user to login to the system, select the user from the list of company contacts and click on the Send Password button. This will send login instructions and user id/password to the email address associated with the new user.

Once a user has been created, they cannot be deleted for audit purposes.

9. To deactivate a user’s account, highlight the user from the list of company contacts and click on the Modify User button.

10. Uncheck the Enabled box on the Add User form and click on the Submit button. The user will continue to be listed as a company contact but will no longer be able to log in to the credit insurance system.

11. If you have more than one profile assigned to your account, the next time you log in you will need to select a profile based on the portal access you require for the current session. 

Need help?

Speak to our customer care team weekdays between 8 a.m. and 8 p.m. ET at 1-800-229-0575 or support@edc.ca.

Date modified: 2023-10-10